
DIY Harvey Dent (Two-Face) Costume: Budget-Friendly Halloween Makeup Guide
Our Halloween Family Tradition: Going All Out!
Every year, our family goes all-in on Halloween costumes, and it’s become one of our favorite traditions. It all started four years ago with a company Halloween costume contest—there was a pretty hefty prize up for grabs, and I decided to put my makeup artist skills to work. Spoiler alert: we won! 🎃
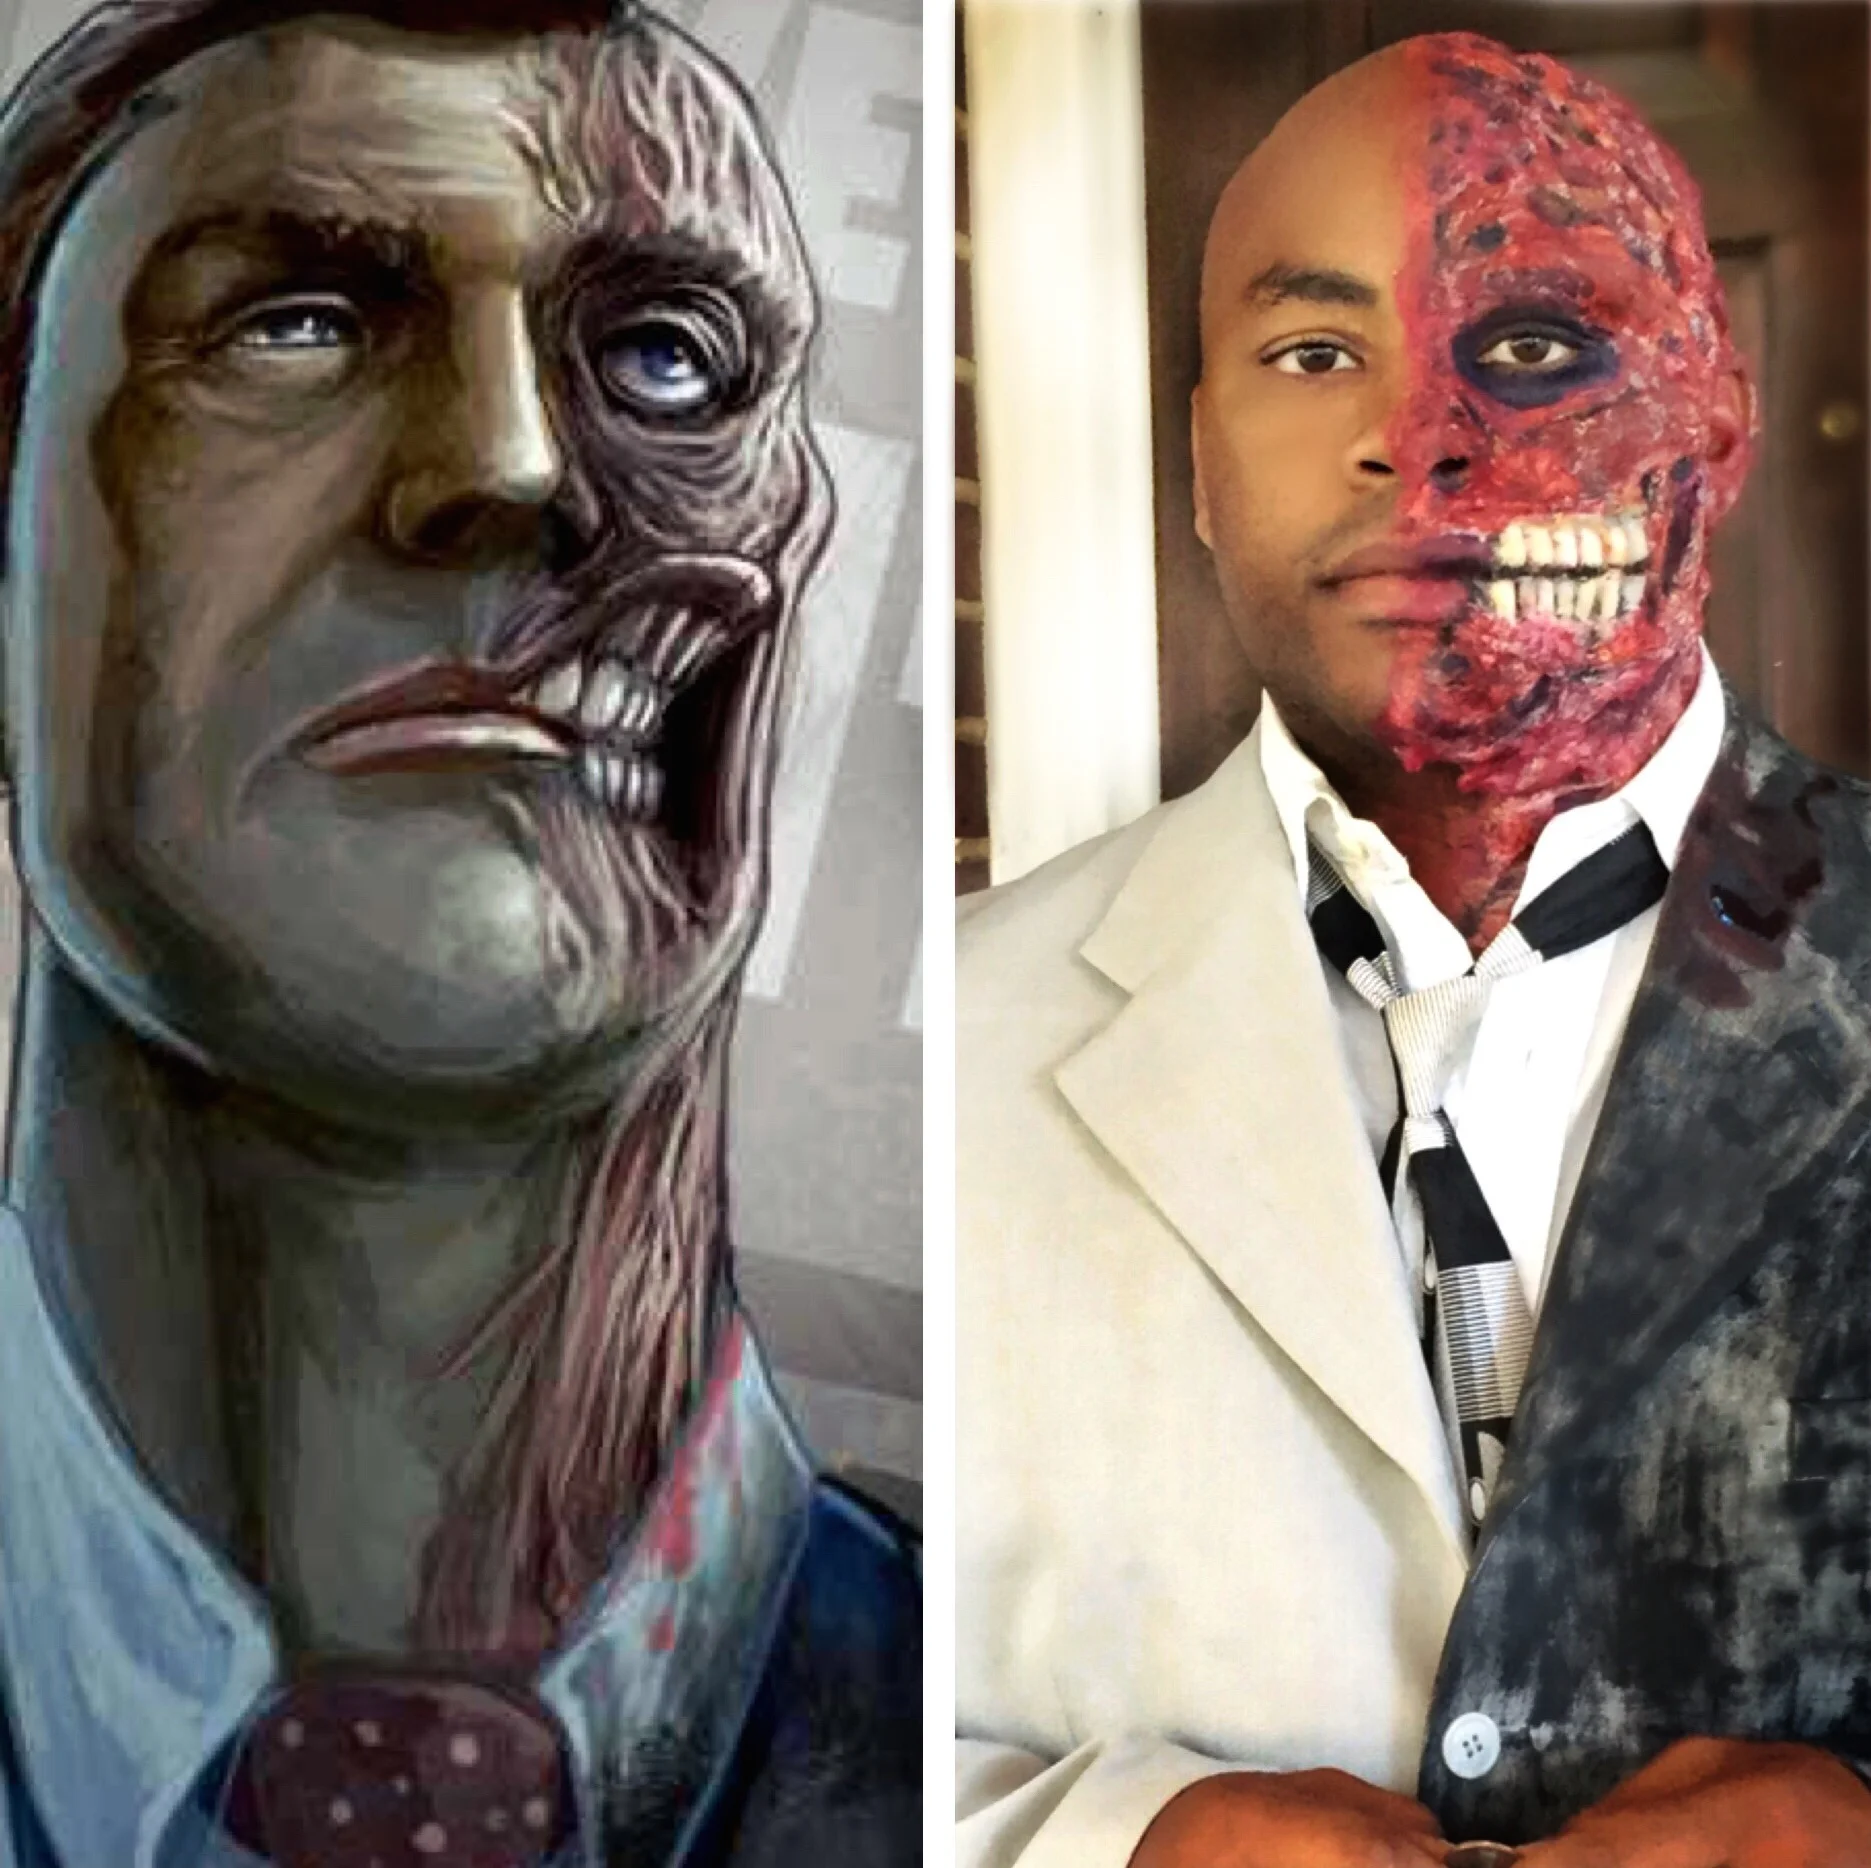
Since then, we’ve continued the tradition, getting creative (and often a little last-minute) with our costumes. Most of the time, I pull everything together within a day’s notice. One of our most memorable creations? A Harvey Dent (Two-Face) costume made with simple products totaling under $20.
If you’re looking for a budget-friendly, DIY Halloween look, here’s what you’ll need:
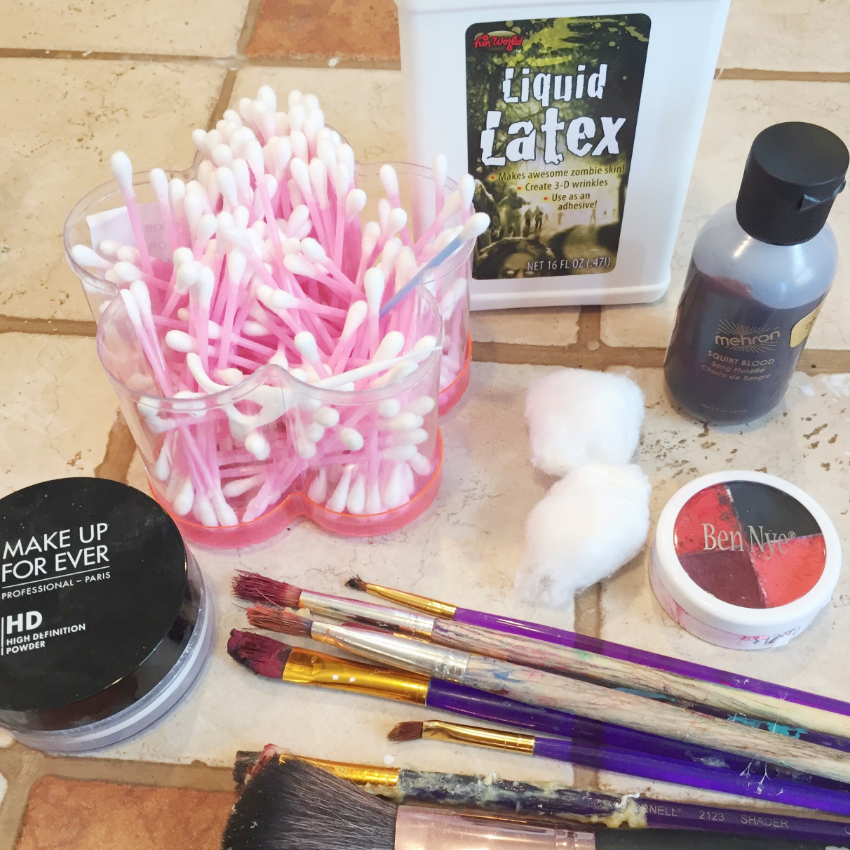
Materials Needed:
Cotton balls
Q-tips
Paint wheel (red, black, purple, and flesh tones)
Liquid latex
Acrylic nails (for teeth detail)
Setting powder (baby powder works too)
Tape (for brow protection)
Brushes (optional, for precise application)
Fake blood (optional, for added gore)
This costume has been one of our favorites, and the best part is how simple and affordable it is to create!

Transform into the iconic Harvey Dent (Two-Face) with this easy, affordable tutorial! Perfect for Halloween contests, parties, or just showing off your makeup skills! Here’s how to do it step-by-step:
Summary:
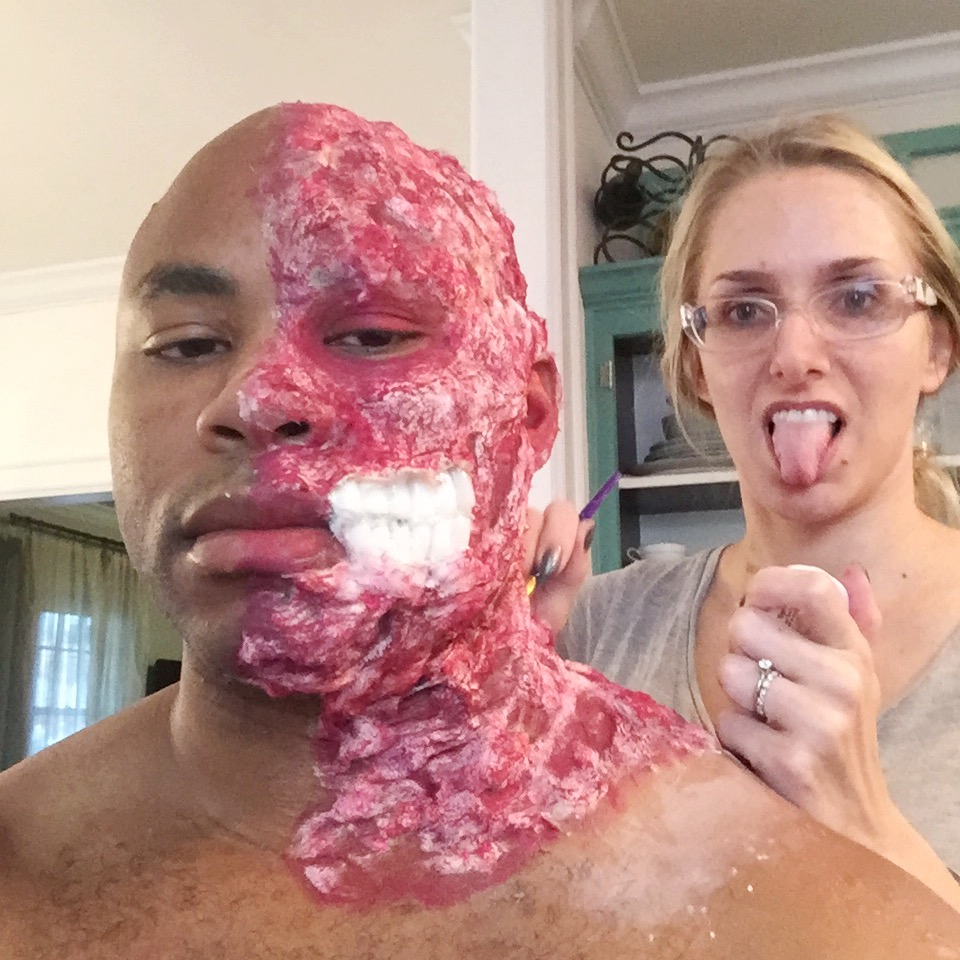
Prep and Build Texture:
Apply liquid latex in sections where you want the "burnt" skin effect.
While the latex is still tacky, layer small pieces of cotton balls to create raised texture.
Add Details:
For added dimension, attach pieces of acrylic nails to mimic exposed bones or jagged skin edges.
Smooth over with another layer of liquid latex to seal everything in place.
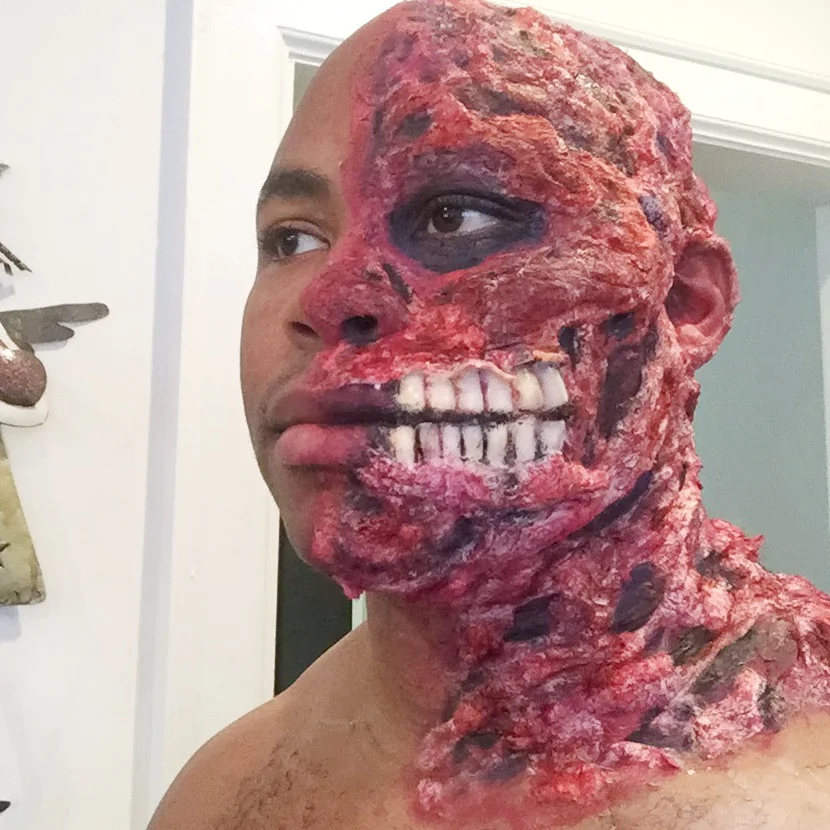
Color and Shade:
Use the paint wheel to layer colors—start with reds and purples for bruising, then add black for depth. Blend in flesh tones to tie the look together.
Set and Finish:
Dust setting powder (or baby powder) over the latex to eliminate shine and give it a matte, realistic finish.
Add fake blood for a gory touch, if desired.
Step-by-Step Instructions:
1. Prep and Protect
Tape the Brow: Use medical or painter’s tape to cover your eyebrow(s) on the affected side. This ensures the latex doesn’t pull out hair when removed.
2. Build the Base Texture
Take small pieces of cotton balls and spread a layer across the face where you want the “burned skin” effect. Focus on areas like the cheekbone, jawline, and around the mouth.
Use a Q-tip to apply liquid latex over the cotton and adhere it to the skin.
3. Add Dimension
For raised areas like cheekbones, the jawline, or brows, layer additional cotton and seal it with more latex. This will give the appearance of damaged, protruding skin.
4. Create the Teeth
Roll small balls of cotton mixed with latex to form the base for “teeth.”
Place acrylic nails in the latex to act as jagged, exposed teeth.
5. Set the Base
Once the latex is fully dry, dust setting powder or baby powder all over to remove shine and give the texture a matte, lifeless look.
6. Paint and Finish
Using the paint wheel, add layers of color to bring the burned look to life:
Red and purple for bruising and raw flesh.
Black for depth and charred areas.
Blend in flesh tones around the edges for a seamless transition.
Add fake blood sparingly around the mouth and wounds for a dramatic, gory effect.
Color Application Tips
Start with Your Base Color:
Apply a base color (like red or flesh tone) all over the textured latex areas to create a consistent starting point.Blend the Edges:
Use lighter shades, such as peach and yellow, around the edge of the “mask” to blend seamlessly into your natural skin tone for a more realistic effect.Create Depth with Mid-Tones:
Take a mid-range color (like dark blue) to enhance the depth in the grooves and pockets of the burned texture. This adds dimension and realism to the overall look.Detail the Gums:
Use red to paint the gums between the upper part of the teeth.
Apply black or blue for the bottom gums to create contrast and a decayed look.
Finish the Teeth:
Add a touch of yellow to the teeth for a stained, grimy appearance.
With these shading techniques, your Harvey Dent costume will have a striking, lifelike quality that’s sure to turn heads! Happy haunting! 🎃🦇